Lugging a lot of supplies to your plein air spot can feel awkward. They definitely grow heavier with each step as you make up your mind on the right spot to set up. Why not create your own portable plein air easel and address the importance of having ergonomic features?
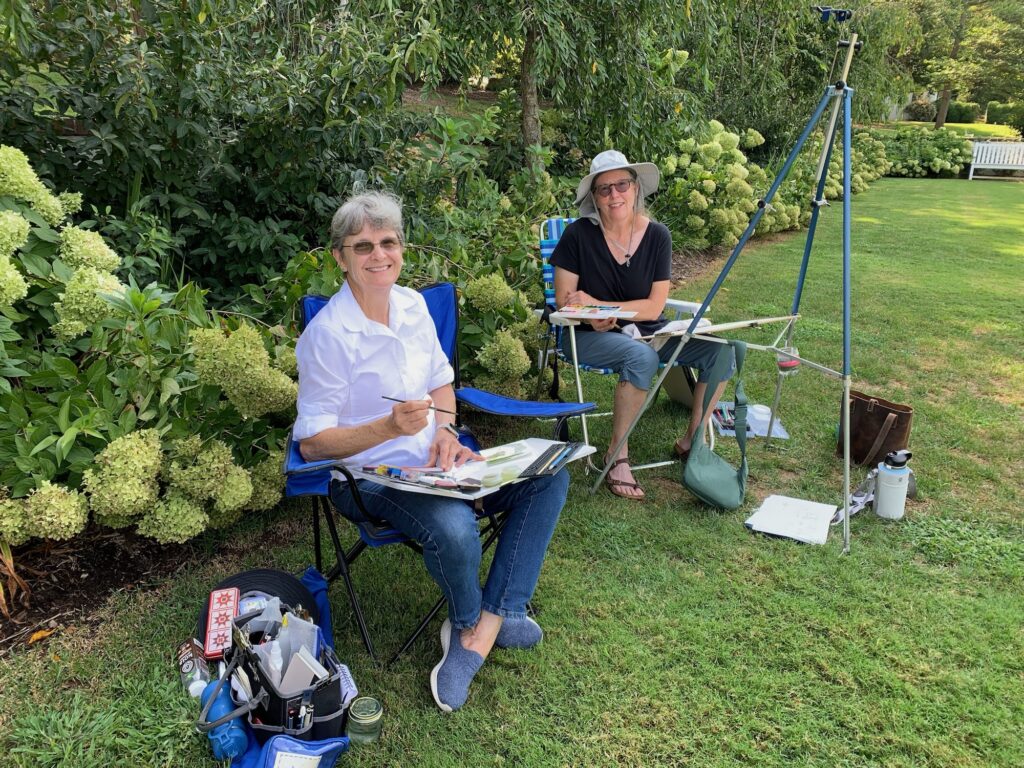
Lately, my friend and fellow artist “S” has been on a quest to build a lightweight and ergonomic plein air easel setup. I’m following her progress as she customizes it to a “T”. She wants her design to allow adjustable flat surfaces for the ideal position relative to keeping her back straight. Using a vertical or horizontal painting position usually is an artist’s preference. Some artists like to stand while painting and others prefer sitting. Some painterly effects are dependent on one position or the other. Regardless of preference, the question of ergonomics is worth considering.
Ergonomic considerations for plein air easel
A primary ergonomic concern is positioning your body as close as you can to the easel’s painting surface to avoid bending. A second one, is having your art supplies handy so you don’t have to contort, bend and lift them from the nether reaches. A third one, is configuring the easel to be lightweight. And, the last one under consideration is portability.

Being able to adjust the height and vertical angles of the painting surface can allow positioning your body to be as close as possible to the painting surface making for a more ergonomic design.
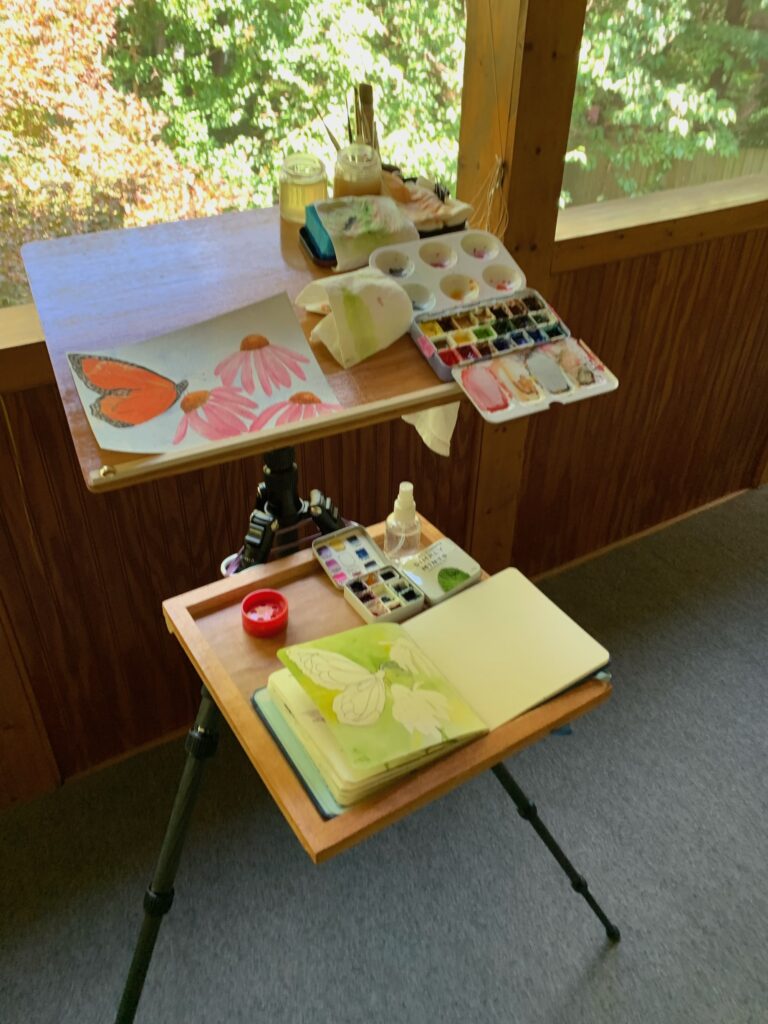
Most easel setups have at least two surfaces: one for painting and another one for holding art supplies. Unfortunately, they’re all-to-often staggered in the vertical alignment. This is definitely not ergonomic, since it means the lower surfaces project out further than those at the top. All of this forces a painter to lean over to paint.
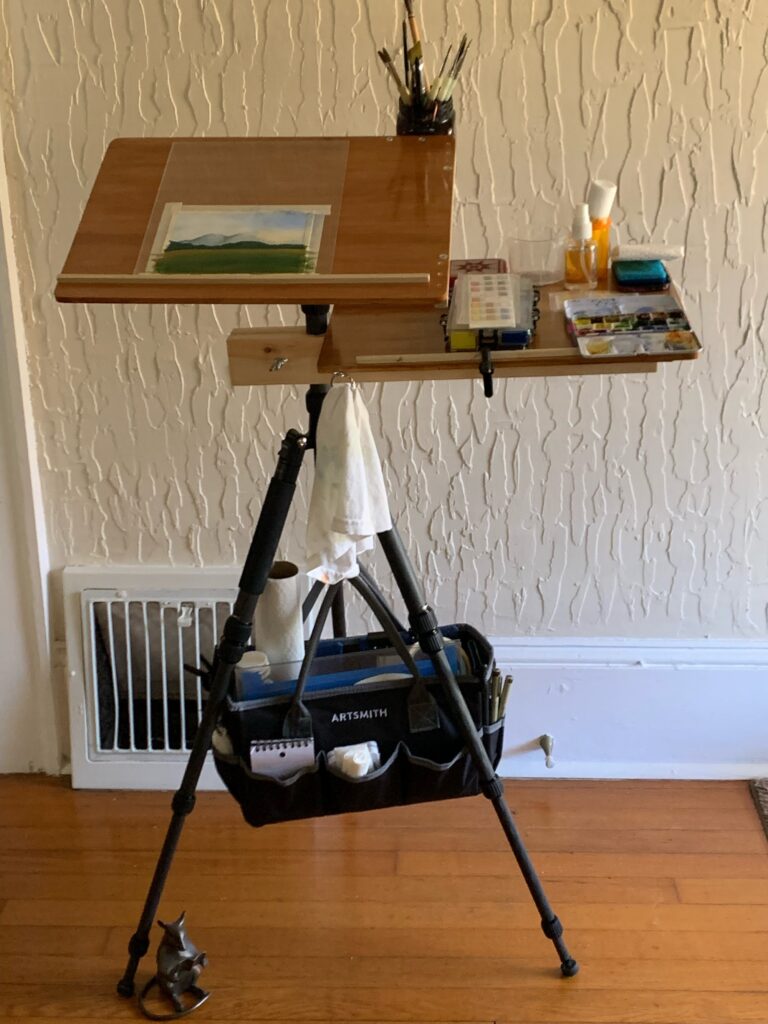
In one of “S’s” early plein air versions (see top photo) the centrally stacked surfaces created too much outward projection. Which is why “S”, in her recent easel modifications, moved the surface for supplies off to to the right rather than a central stacking (see middle image).

Mother of invention
“S” knows how to make things. So far, she’s bought a lightweight, collapsible tripod and ball head attachment on eBay to create the easel’s base. She nabbed two bamboo cutting boards at Dollar Tree to serve as the painting surfaces. The boards are easy to drill into, making it easy to attach to the tripod by way of the quick release mechanism by Arca Swiss. By adding several coats of polyurethane to the boards, she’s protecting them from warping as a result of common water spills. (See Epilogue at the end of this post for alternative board coatings.)
“S” also added a wood support arm to stabilize the ancillary board used for holding her art supplies. Her method of attaching the board to the arm is by using velcro strips glued onto the two joining surfaces. To make the arm, she clamped two wood lengths together and drilled a hole in the center large enough to fit them around the tripod center post. Then, she added screws and wing nuts to tighten and stabilize the arm’s position. The niftiness of this modification is that it makes the arm stow-able for travel.
The boards were easy to drill holes into to countersink magnets, which is such a convenient method to attach metal palettes and water containers. “S” attached a strip of wood at the lower edge of the boards to keep her painting surface and art supplies from falling off. Large binder clips are attached here and there for stabilizing various things like blocks of watercolor paper, painting journals or other painting supplies. I wasn’t surprised when she told me she scavenged in her garage stash to find various other handy clamps and hooks.
Making a plein air “to-go” carry bag
All of “S’s” art supplies for plein air are stowed in her Rick Steeve’s “to-go” backpacking bag. It even includes the easel set up and portable Artsmith storage tote bag that she fills with various and sundry art supplies. It defies the imagination as to how it can hold everything, but it does. It’s simply a marvel to behold. Altogether, it weighs 14 pounds, which is pretty good, given the comprehensiveness of her supplies. Like I say, “S” is unstoppable when she sets her mind to it.
Variations on the perfect easel set up
We all have a different take on what makes the perfect set up for a traveling easel. For example, I’m left handed, so I’ll be needing a mirror-image version of “S’s” right-hand configuration. I like both standing and sitting options while painting, which means I’ll be looking to purchase a tripod with enough options to achieve different painting heights. Also, I want my supplies handy, which is where it gets fun. I’ve seen how imaginative “S” is in her easel’s attachments of multiple small paint palettes, blotting stations, towels, brushes, and more through her use of magnets, clamps, and hooks.
I don’t have my own perfect set up yet for en plein air, so I just stuff everything in a backpack and bags and carry my old-fashioned, webbed chaise chair using an attachable strap. I can’t argue the fact that it’s cumbersome and messy, but it doesn’t stop me.

However, I’m fascinated by “S’s” efforts. She’s so clever, resourceful and thrifty. I love watching her engineering magic. She’s nearly done perfecting the easel and told me she’s quite happy with her last configuration. I know I can count on her to share with me an impressive set of instructions. And then I can consolidate my supplies into a much more portable collection. Perhaps then, I’ll get out more often to paint in the great outdoors.
Another en plein air challenge is the ever-changing light conditions, which test our talents to capture the ambience. I’ll save this topic for another day.
Epilogue
I just had another fascinating discussion with “S”, this one about the use of beeswax instead of polyurethane to protect the wood painting surfaces. She said she was trying to get away from using urethane coatings and figured that the same protectant she uses on wood cutting boards and kitchen counters should be sufficient to prevent warping on her boards that are for painting surfaces. An unexpected advantage of switching to beeswax was the aesthetics: “S” says, the color of the waxed wood looks better.
Starting with two additional wood boards, “S” coated them with her homemade wax paste, which is actually a 50-50 mix of beeswax and food-grade mineral oil. She said the beeswax can be purchased as granules or bars.
There’s a bit of a process, she says, to prepping the paste. First, soften the mix by warming it in a double boiler or something comparable (not the microwave!). Next, apply the paste broadly but lightly over the wood surface. (Special tip: If you’ll be gluing on the wood strip at the lower edge of the board, be sure to glue it to the board before applying the paste. Otherwise, the add-on won’t adhere to the board.
“S.’s” final step is to warm the boards in the oven on a super low temperature to help the paste permeate the wood pores. She recommends applying more than one application of the wax paste; each one followed by warming the board in the oven.
Copyright 2023-2024 Driftwilde | Privacy Policy | Disclaimer | Terms and Conditions